Installing OpenVPN (courtesy of UTORvpn)

  1. Go to https://vskey-gw.eis.utoronto.ca/, and log in with your VSKEY username and password.
  2. Fetch the OpenVPN software. It can be downloaded from here.
  3. To install OpenVPN, you must be logged in as a user with administrator privileges.
  4. After accepting the license agreement, click next until the installation process starts. At some point during the installation, you will be prompted to install a "TAP" Network Adapter. Click "Install" to continue.

  5. Once the installation has finished, click "Next" and "Finish" to exit the installer. You should see a new icon on your desktop named "OpenVPN GUI".


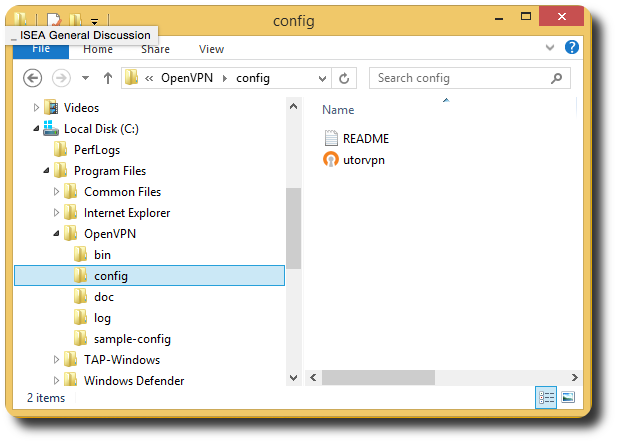
  6. To install the OpenVPN configuration files, open up the file browser and locate the directory:

    Local Disk (C:) -> Program Files -> OpenVPN -> config

    Fetch the two configuration files ( vskey-gw.crt and vskey-gw.ovpn ) from the VSKEY-GW VPN gateway and place them in this folder.


  7. That's it! Now that you have installed OpenVPN on your computer, continue reading here to learn how to start up and use OpenVPN.